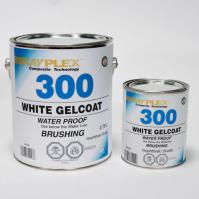
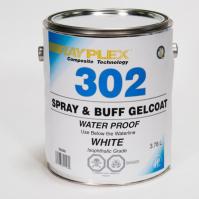
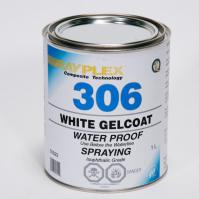
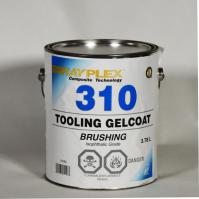
Gelcoats are ISO/NPG Grade Waterproof and UNWAXED
Can be used below the water line, and also for "Swimming Pool repair & recoating.
Gelcoat Series and their uses:
Tooling Gelcoat: Production molds Available in Brush Or Spray
Super Black or Super White Gelcoat Blackest Black or Whites White Available- Spraying Only
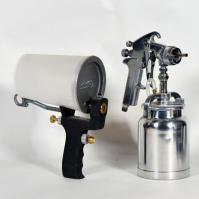
321 Ultra Spray White: Sprays using a Preval Sprayer
322 Color Matched Gelcoat: Color matched to your sample provided.
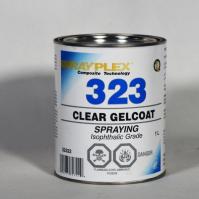
323 Clear: Used for metal flake or for marble bath ware.
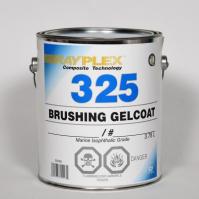
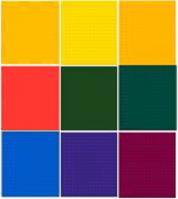
325 Tinted Gelcoats: Are pre-tinted from over 300 stock colors.
372 Patching Gelcoat: Gelcoat that applied like body fill. See Brushing Gelcoats
Specialty Items
550 Honey Wax: Mould release wax.
554 PVA: Spray on Release agent. Washes off with water.
We offer coloured gel coats to RAL colour numbers.
All our Gelcoats are UNWAXED
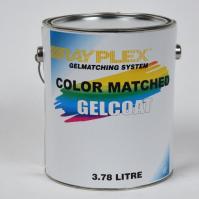 Color Matching Gelcoat
Available only if you send us a 1x1 sample. Allow 2-3 weeks for custom matching.
Available in 1 Gallon or 5 Gallon Qty.
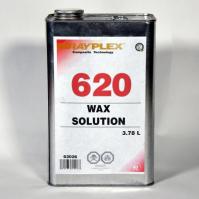 Wax Solution 5%
Add to unwaxed polyester resin, vinyl ester resin, or gel coat to make it non-tacky when dry.
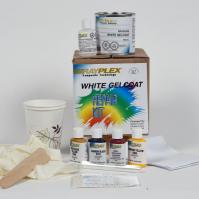 Gelcoat & Fibreglass Repair Kits
Minor Gelcoat & Fibreglass repairs are easy to do. Most people can achieve professional results the first time.
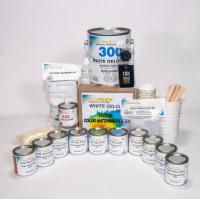
Patent Pending
This is a complete kit for advanced color matching. See the Demo Program on using the VECTOR Color Matching System. Link to Follow
Minor Gel coat repairs are easy to do allowing you to achieve professional Color Matched results the first time.
KIT Includes:
- 3.78L White Brushing Gelcoat c/w Catalyst.
- 237ml Wax Solution
- 1 NIX Mini 3 Meter
- 10 237ML LDX Gelcoats:
- 1 Super Black
- 1 Super White
- 1 Chrome Yellow
- 1 Iron Oxide
- 1 Dark Brown
- 1 Tan
- 1 Red Brown
- 1 Deep blue
- 1 Deep Green
- 1 Red
- 10 pair of Latex Gloves
- 40 6" Mixing sticks
- 20 100ML Mixing cups
- 10 500ML Mixing Cups
- 1 Sample Mixing Pack
- 40 Mix Sheets White
- 40 Film Sheets
- 2 Gray Match Cards
- 1 Sanding Kit C/W Compound
- 1 Access Key emailed - valid for 3 Months
A complete instruction guide to take you through the process 4 grades of sandpaper A course & fine buffing compound. Features are: Can be used for repairs above and below the waterline 10 LDX Gelcoats included in kit but various colors available Can be used to repair Fibreglass such as hot tubs, shower stalls, boats and recreational vehicles. 6lbs / 2.72kg
Rayplex Recommended
Uses:
-
Repair of nicks and dings or worn areas on fiberglass boats. Also use as interior coat
when rebuilding a hull.
-
Re-coat the faded surface of a fiberglass swimming pool.
-
Paint the inside of a concrete bird bath.
-
Repair surface cracking on in-ground fiberglass pool.
-
Topcoat finish on a fibreglass tub repair.
-
Coat live well fish boxes.
-
Can be used on fiberglass, wood, or other materials for waterproofing.
Features:
-
Forms a tough and resilient layer that guards against scratches, impacts, and the elements.
-
Easy application, allowing both professionals and hobbyists to achieve remarkable results with minimal effort.
-
Sands easily and buffs out for a perfect finish.
-
Provides a long-lasting protection against the harmful effects of sunlight.
-
Protects your surfaces against the effects of chemicals and harsh substances.
Application:
-
Use for doing repairs (boat, snow mobile, RV, swimming pool, shower, tub, sink, etc) or making a mold.
-
Whether you're refinishing a boat, restoring a vintage car, or upgrading your home surfaces, trust our Gelcoat to deliver outstanding results.
Rayplex gelcoats are top of the line NPG Isophthalic grade and are "UNWAXED".
What Does Unwaxed Mean
Unwaxed Gelcoat can have multiple applications without the need for sanding between coats. As a result the surface with always be a little tacky and will clog sandpaper when first sanded. The sticky surface can be removed by wiping with Rayplex Acetone. For repair work Rayplex suggest you add Wax Solution to the last layer for a non sticky surface.
Tinting:
Use Rayplex Pigments to tint or adjust the colour if required. Rayplex Gelcoat can be coloured prior to adding catalyst. Adding colour to a Neutral gel coat produces bold or primary dark colours; adding colour pigments to a white gel coat creates lighter, pastel colours.
QUESTIONS about Gelcoat
- Is the neutral RAYPLEX Gelcoat clear in color?
- Can I use RAYPLEX pigments to color RAYPLEX Gelcoat?
- How do I apply RAYPLEX Gelcoat using a brush/roller?
- What is the shelf life for RAYPLEX Gelcoat and polyester resin products?
- Can I apply RAYPLEX Gelcoat to concrete?
- Applying RAYPLEX Gelcoat over cured epoxy?
- What chemical to thin RAYPLEX Gelcoat?
- Application Guidelines RAYPLEX Gelcoat with Wax or without Wax?
- What is the overcoat time when applying RAYPLEX Gelcoat without wax?
- Why is the finish dull and not glossy when RAYPLEX Gelcoat cures?
- How long do I need to wait for gelcoat to cure before I can sand it?
- How soon should I remove PVA from gelcoat after the gelcoat has cured?
- How much MEKP is needed to catalyze RAYPLEX Polyester Laminating Resin?
- Is Rayplex Gelcoat UV stable?
- Can I apply RAYPLEX Gelcoat to a fiberglass swimming pool?
- Does RAYPLEX Gelcoat require thinning?
- Gelcoat has Wrinkles
- Gelcoat takes long time to cure.
- Sagging Gelcoat
- Gelcoat Sticking to part
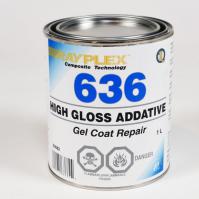
- What are the benefits of High Gloss Additive?
ANSWERS about Gelcoat
- Is the neutral RAYPLEX Gelcoat clear in color?
- The neutral RAYPLEX Gelcoatis is not clear, but translucent beige. It's designed to be tinted with Rayplex Pigments in order to create a custom color. Neutral gelcoat is used to create primary colors such as greens, yellows, reds, blues, and black.
- Can I use RAYPLEX pigments to color RAYPLEX Gelcoat Or Resin?
- Do not use the RAYPLEX POigments to add color to RAYPLEX RESIN or any other polyester resin products, such as RAYPLEX Polyester Resin , because the results do not look very good and the material may not cure properly. A more effective way to tint gelcoat and ensure a proper cure is to use RAYPLEX Pigments, available in 16 popular colors.
- How do I apply RAYPLEX Gelcoat using a brush/roller?
To apply RAYPLEX Gelcoat by brushing, use a Rayplex Bristle Brush, with tapered bristles, that's not too stiff. When rolling, we recommend Rayplex Rollers gelcoat and resin safe rollers that won't shed hairs or lint.
If you're using RAYPLEX Gelcoat without wax, add 5% Wax Solution or Air-dry Additive in the last coat. For best results, Rayplex recomends using 1.5 to 2% Catalyst. use only the amount of MEKP catalyst needed for the amount of gelcoat you're using and the temperature conditions.
Thinning should not be required for most brushing/rolling applications, but if needed, thin with styrene - don't add more than 10% to avoid future yellowing.
Always apply gelcoat in proper conditions - 50-95°F (70-80°F is ideal), with 0-90% relative humidity (. So the coating flows properly and self levels, do not apply gelcoat in direct sunlight.
See our Video on the 4 types and methods of application.
- What is the shelf life for RAYPLEX Gelcoat and polyester resin products?
- Over time the chemicals or promoters tend to loose there strength. So the resin or gelcoat will take longer to cure.
- RAYPLEX Gelcoat and RAYPLEX polyester resin products will eventually harden in their containers - even without mixing in MEKP catalyst. The length of their limited shelf life depends on each product's formulation and the conditions in which they're stored. For maximum shelf life Rayplex recommends storing resins and gelcoat out side in the garage. The materials are oil based and the cold temperatures does not effect the length of storage or harm the product.
- Typically, the shelf life for uncatalyzed polyester resins is about 6 months, if stored in cool, dry conditions, in temperatures below 70°F. If stored properly, the shelf life may exceed 6 months, but always check to see if the material has thickened or polymerized before using.
- Can I apply RAYPLEX Gelcoat to concrete?
No. The RAYPLEX Gelcoat products will not bond to concrete which is very acidic, so not apply RAYPLEX Gelcoat to concrete.
- Can I apply RAYPLEX Gelcoat over cured epoxy?
-
Rayplex Gelcoat is a Iso Based polyester resin, and as such, is not compatible over epoxy.
Small gelcoat repairs, epoxy can be used, then finished with gelcoat. Make sure the epoxy surface is well sanded and solvent wiped with Rayplex Actone after being sanded to a dull finish. Rayplex suggests doing a test first to make sure that the gelcoat will stick.
-
Can I thin Rayplex Gelcoat?
- Rayplex offers 3 main types of gelcoat, Brushing, Spraying and Spray and Buff.
- To thin gelcoat use Rayplex Stryene. We recomend not adding more then 10% by volume. Do not use actone as it casues the gelcoat to go rubbery and not cure properly.
- Spraying and Spray and Buff Gelcoats are designed for spraying and can be thinned with Rayplex Stryene if required. Rayplex suggest mechanical mixing the gelcoat first as crosslinking over time tends to thicken the gelcoat. So by mixing your breaking down the crosslinking that has occured which makes the gelcoat thinner.
When deciding whether to use gelcoat with wax or without wax, there are a few factors to consider:
- Surface Finish: Gelcoat with wax is typically used as a final coat to create a smooth, dull surface finish. The wax acts as a surfacing agent, rising to the surface of the gelcoat as it cures to create a barrier that helps to seal the surface and provide a glossy finish. Gelcoat without wax is often used for initial coats or repairs, as it allows subsequent layers to adhere properly without interference from the wax.
- Application Process: Gelcoat with wax is easier to apply for final coats since it creates a self-leveling surface that requires sanding and polishing after curing. Gelcoat without wax may require more sanding as the surface will be tacky.
- Compatibility with Additional Layers: If you plan to apply additional layers of fiberglass or gelcoat, using gelcoat without wax for the initial coats can ensure better adhesion between layers. Gelcoat with wax may hinder adhesion, requiring additional preparation such as sanding or the use of special primers.
In summary, if you're applying a final coat and prioritize ease of application and a glossy finish, gelcoat with wax is a suitable choice. However, if you require better adhesion between layers or if you're applying additional coats, using gelcoat without wax may be more appropriate.
What is the overcoat time when applying RAYPLEX Gelcoat without wax?
The overcoat time, also known as the "gel window" or "recoat window," refers to the period during which a subsequent layer of gelcoat can be applied over the previous layer without the need for sanding or additional surface preparation. This time frame is crucial for ensuring proper adhesion between layers and achieving a smooth, seamless finish.
The overcoat time for RAYPLEX Gelcoat without wax may vary depending on factors such as temperature, humidity, and the specific formulation of the gelcoat. Most important the amount of catalyst added to the gelcoat.
Generally speaking 2 to 4 hours is usual. If there are wet spots this my be a sign of improper mixing or low catalyst levels. Wait till these areas dry up. A simple test is using your finger nail to see if you can slice the cured gelcoat with your nail. If you can wait.
In our fabrication days we always applied gelcoat coat in the afternoon and let it dry overnight. We found rushing always lead to repair work later.
Rayplex Gelcoat cures to a dull finish rather than a glossy one for a few reasons:
-
Surface Texture: The application technique and conditions can affect the surface texture of the gelcoat. If the gelcoat is not applied smoothly or if it is brushed or rolled on, it can create a textured surface that appears dull rather than glossy.
-
Curing Conditions: The curing conditions, such as temperature and humidity, can influence the final finish of the gelcoat. If the gelcoat cures under less-than-ideal conditions, it may not fully cure to a glossy finish.
-
Additives and Pigments: Some gelcoats contain additives or pigments that can affect the final appearance. Certain additives may dull the finish or cause it to appear less glossy once cured.
-
Post-Curing Techniques: Gelcoat my need more time to cure before further buffing or sanding. Undercured gelcoat is sometimes soft and will not polish to a shine.Sometimes, post-curing techniques such as If these techniques are not applied or are done incorrectly, the gelcoat may remain dull.
- Sanding a Buffing Sanding or buffing and polishing are necessary to achieve a glossy finish. Rayyplex has two compounds that offer a low cost and buff to a brilliant shine. RayBuff 100 and RayBuff 200
To achieve a glossy finish with Rayplex Gelcoat, it's important to ensure proper surface preparation, application technique, curing conditions, and potentially consider post-curing techniques if necessary.
How long do I need to wait for gelcoat to cure before I can sand it?
The amount of MEKP (Methyl Ethyl Ketone Peroxide) needed to catalyze RAYPLEX Polyester Laminating Resin can vary depending on several factors including ambient temperature, desired curing time, and the specific formulation of the resin. However, as a general guideline:
- For laminating the typical mixing ratio of MEKP to polyester resin is between 1.0% to 2.0% by weight.
- For general-purpose laminating, a common ratio is 1.5% MEKP to resin by weight.
For a demonstration on Catalyst Measuring watch our video
Is Rayplex Gelcoat UV stable?
Rayplex Gelcoat is UV stable, meaning it is designed to resist degradation and color fading caused by exposure to ultraviolet (UV) light from the sun. UV stability is an essential characteristic for gelcoat used in outdoor or exposed applications such as boat hulls, marine parts, and other fiberglass components that are subject to sunlight.
Can I apply RAYPLEX Gelcoat to a fiberglass swimming pool?


